- 01Identify press and plate→
- 02Measure openings and fixing→
- 03Review sample or drawing→
- 04Approve cloth construction→
- 05Install and check first cycle
The flow confirms fit before supply. Depressurize and isolate the press before installation; do not open under pressure or bypass safety controls.
When to Replace a Filter Press Cloth
Replacement is worth reviewing when cloths are torn, permanently blinded, stretched, leaking at the sealing edge, difficult to mount, or no longer releasing the cake consistently. A longer cycle can also come from feed conditions, plate alignment or cloth clogging, so a new cloth should not be treated as an automatic cure. Send photos of the cloth in place and describe the symptom before choosing a construction.
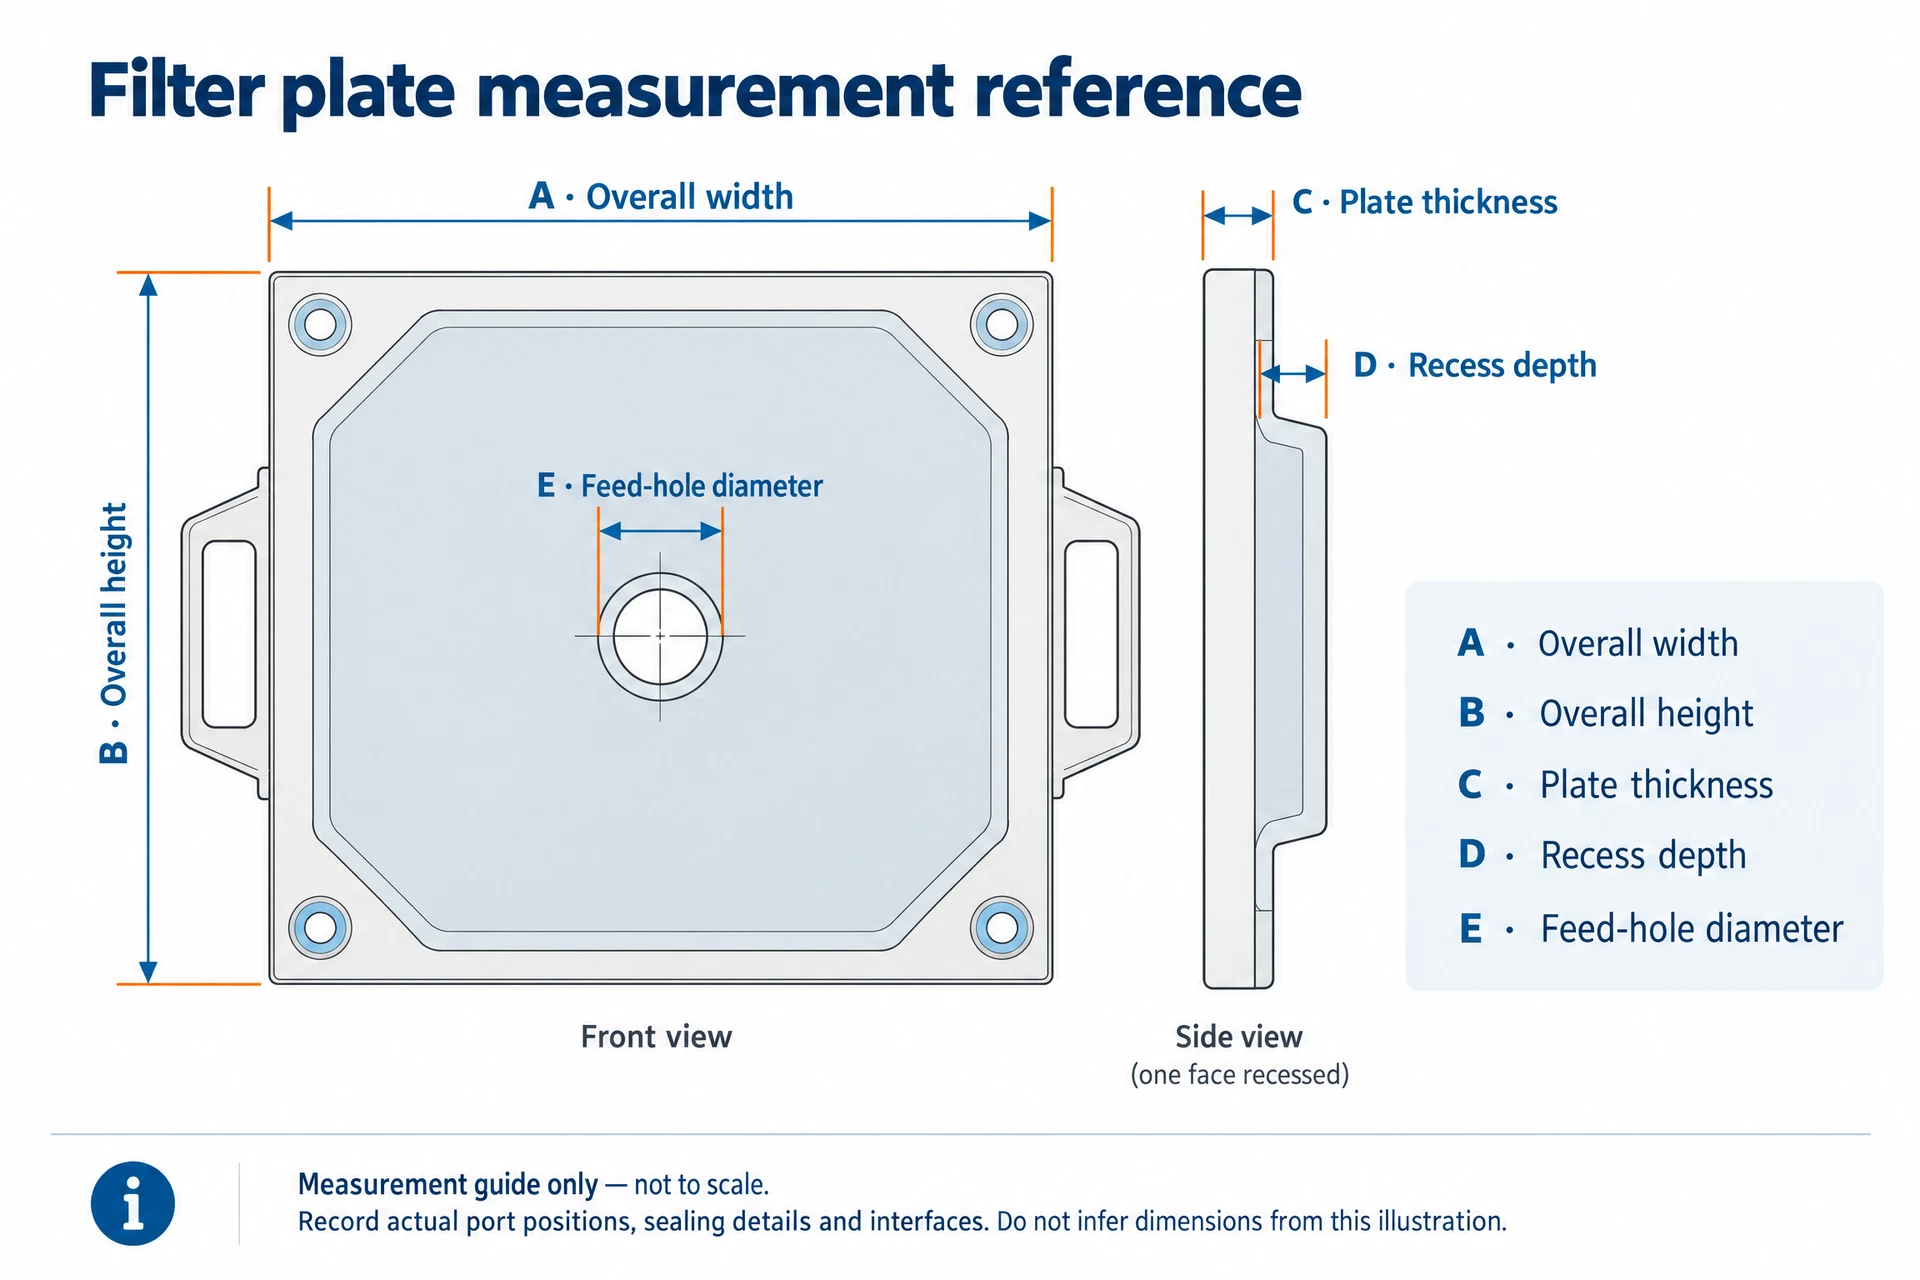
- Use the plate and cloth measurement guide before recording dimensions.
- Keep one removed cloth as a reference until the replacement has been approved.
- Separate filter-cloth washing from filter-cake washing; they are different operations.
- Do not infer filter-cake moisture, cycle time or service life from cloth material alone.
| Observed condition | First decision | Information to send |
|---|---|---|
| Tear, split seam or damaged eyelet | Check whether damage is local or repeated across the set | Close-up photos, plate position and removed cloth |
| Filtrate is cloudy | Check sealing, plate alignment and cloth fit before changing fabric | Filtrate route, plate photos and operating symptom |
| Cloth is hard to clean or blinds | Review solids, washing method and weave suitability | Slurry description, washing practice and cloth sample |
| Cake releases unevenly | Check mounting, wrinkles, plate face and cake properties | Front and back photos plus release sequence |
Cloth Construction and Fit
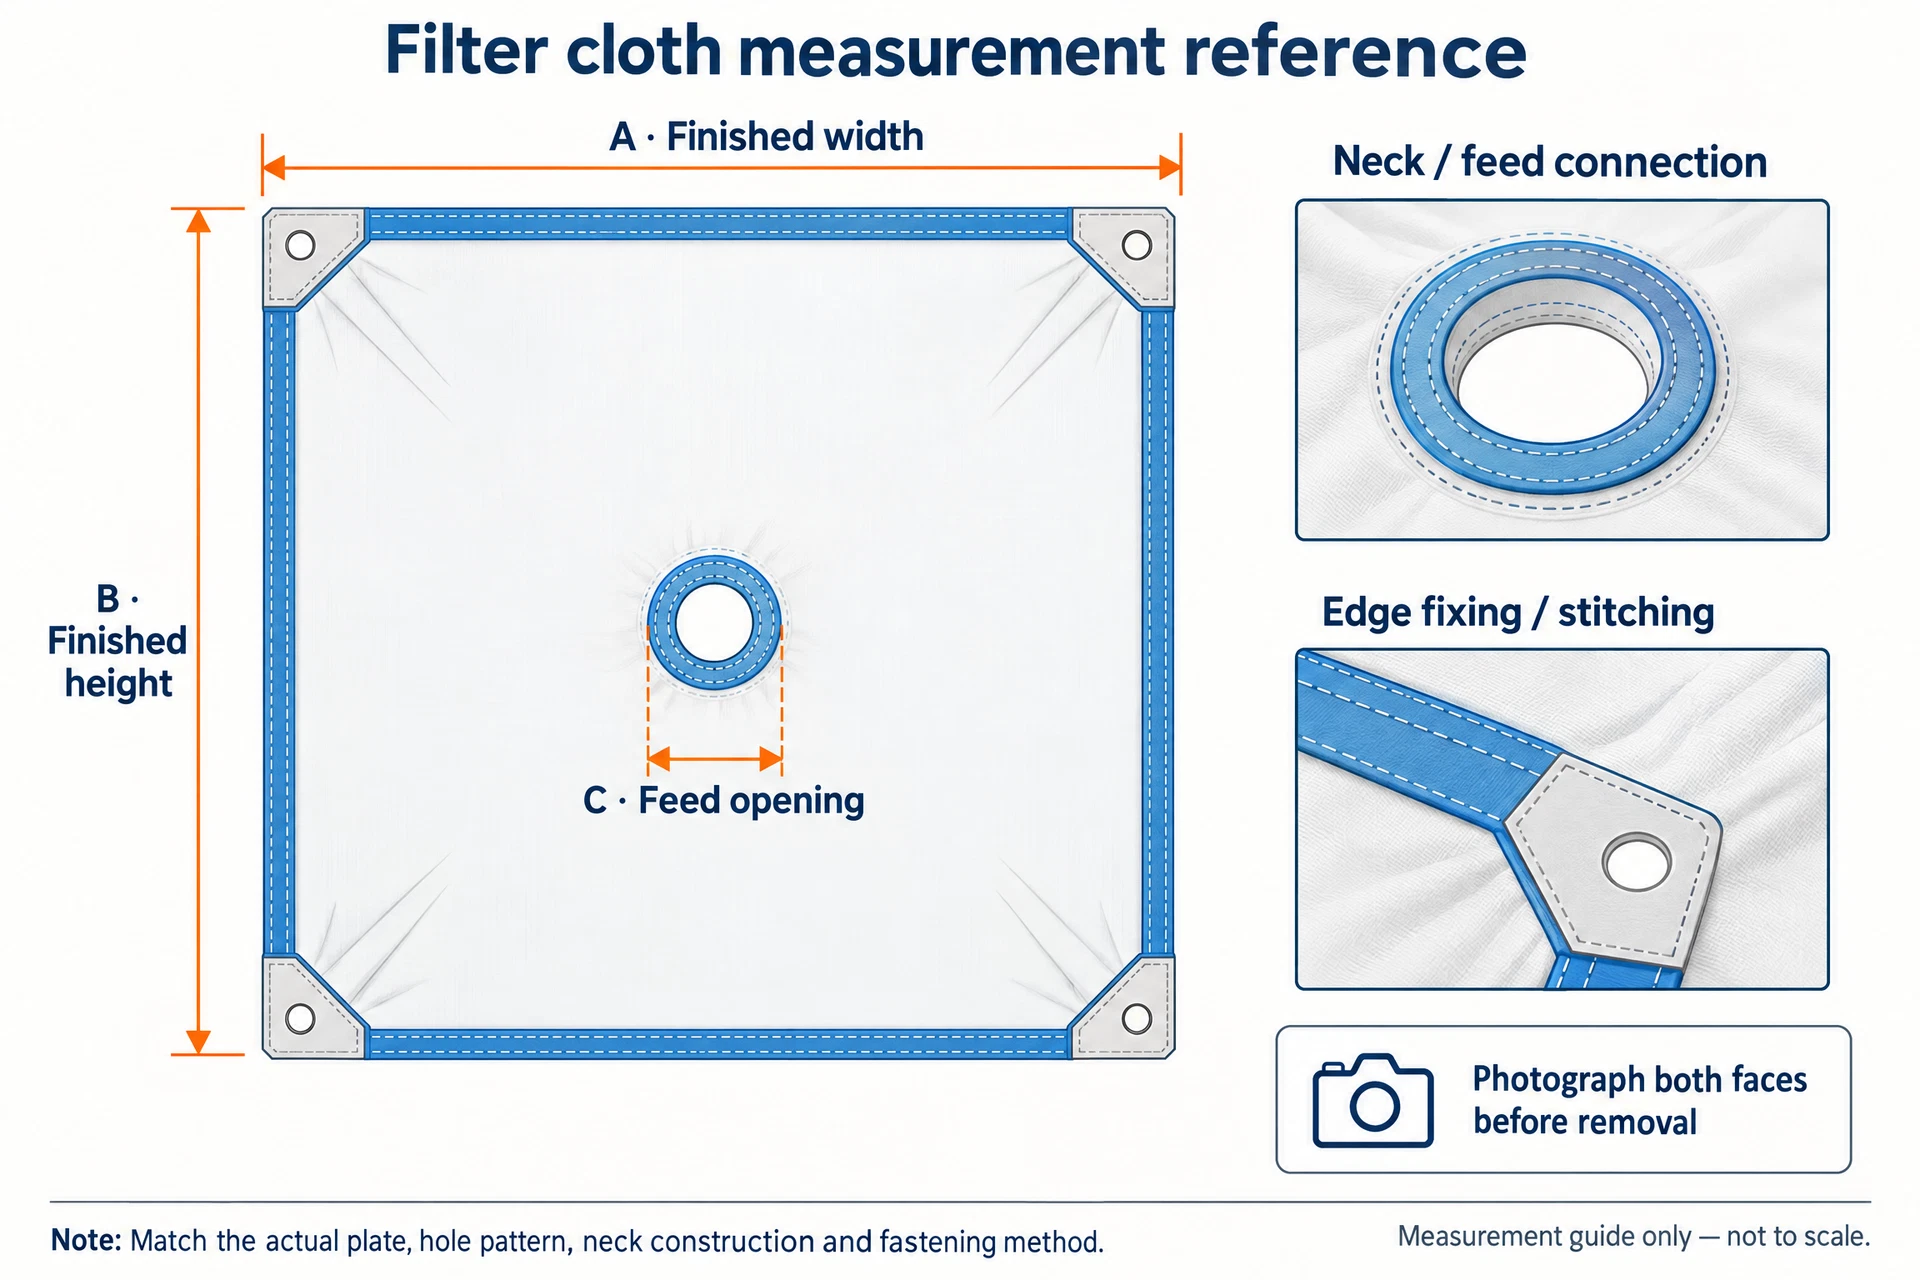
The cloth must match the filter plate face and its filtration path. Depending on the plate and mounting arrangement, the relevant details can include a center feed opening, corner holes, a neck or collar, hanging or snap fastening, edge stitching, eyelets, ties, and the sealing perimeter. The front and back sides may not be interchangeable. A cloth that has the right outside length but the wrong hole position, neck depth or fixing detail can restrict feed, leak filtrate or sit outside the sealing area.
| Fit field | Why it matters | How to verify |
|---|---|---|
| Overall length and width | Controls coverage of the plate face and sealing perimeter | Measure a flat removed cloth without pulling it longer |
| Center opening, corner holes and neck | Maintains the feed or filtrate route | Measure opening size and hole center-to-center distances |
| Edge, seam and fixing method | Prevents movement, bypass and premature seam damage | Photograph front and back and identify every attachment |
| Plate and filter-room dimensions | Confirms the cloth sits inside the actual chamber | Record plate size, cloth thickness and chamber depth when known |
Information Needed for Matching
Start with the equipment nameplate. Provide the press maker, model or plate designation, plate quantity if known, and any marking on the cloth. Add clear photos of the whole filter press plate, the plate front, back, side and handle area. A drawing, an unused cloth, or one carefully removed used cloth is especially useful when the nameplate does not identify the cloth pattern.
Describe the actual service: material being filtered, approximate solids description, temperature range, pH if known, feed and washing practices, whether the filtrate must be collected separately, and the difference you want from the original cloth. Explain whether the request is a direct replacement or a process improvement. This prevents a material or construction change from being approved without the operating context.
- Equipment nameplate and press or plate model
- Plate length, width, thickness and chamber depth when available
- Filter-cloth material or label, weave description and quantity
- Center feed, corner-hole, neck, edge and fixing measurements
- Slurry, temperature, pH, feed conditions and cloth-washing practice
- Photos, drawing, sample and the desired original-versus-improved result
Review and Supply Process
The matching process follows the evidence available for the press. First, submit the nameplate, dimensions, photographs and process notes. Next, Shengqi checks the plate geometry, mounting arrangement, filtration openings and material request. If a detail is uncertain, the open point is identified rather than replaced with an assumed dimension. A drawing, sample approval or a comparison against the removed cloth can then be used before batch production.
| Stage | Customer action | Confirmation point |
|---|---|---|
| 1. Identify | Send nameplate, plate and cloth photos | Press and plate identity are readable |
| 2. Measure | Complete dimensions and hole or fixing fields | Units, reference edges and missing fields are clear |
| 3. Review | Send drawing or physical sample if requested | Fit, material and construction are agreed |
| 4. Approve | Confirm original replacement or proposed change | Quantity and specification are fixed before supply |
| 5. Install | Check orientation, tension, openings and sealing | Trial installation is safe and the cloth is seated correctly |
Installation Checks
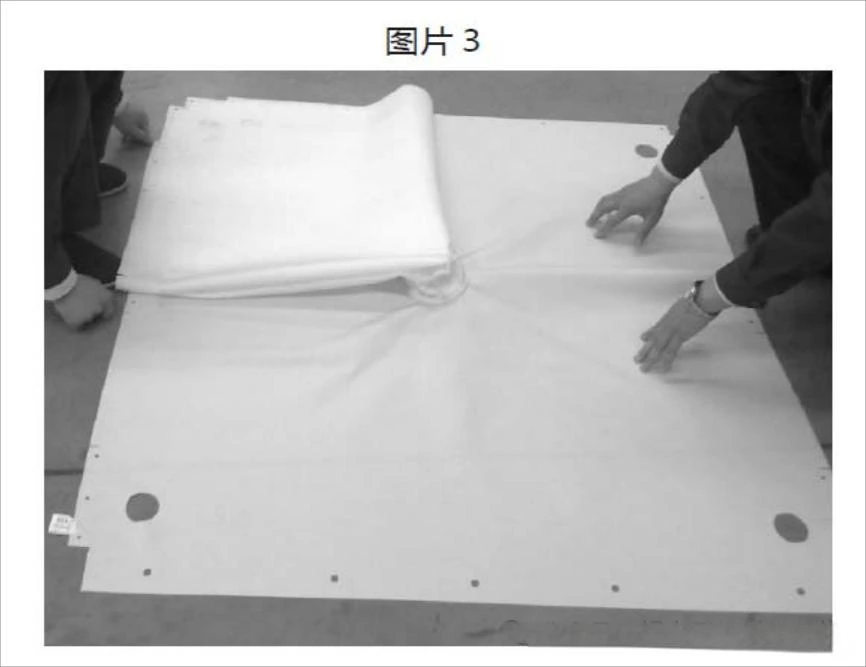
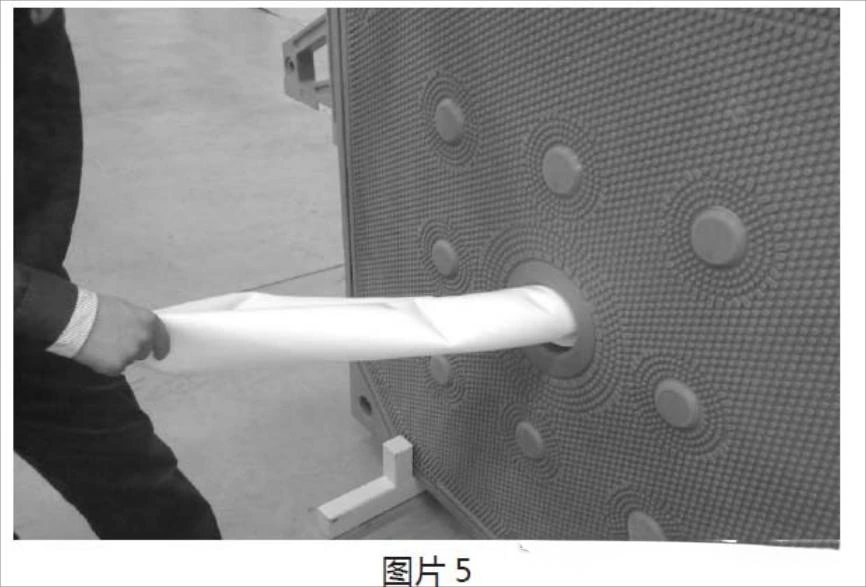
Before installation, isolate the filter press according to the site procedure, stop feed and release stored pressure. Never open a press under pressure, and never perform electrical work while energized. Confirm the replacement cloth orientation, center or corner openings, seams and fastening points against the approved drawing. Keep folds and loose edges out of the sealing surface. After installation, inspect the plate pack and run the first cycle under the site-approved operating procedure; check for leaks, abnormal movement and the intended filtrate route.
If the new cloth does not fit, stop and record the mismatch rather than forcing a hole, cutting a sealing edge or bypassing a safety interlock. Send photographs of the installed position and the approved specification for review.
- Verify the plate pack is depressurized and isolated before opening or handling cloths.
- Match front/back orientation and keep feed and filtrate openings unobstructed.
- Check seams, collars, eyelets, ties and sealing edges before closing the pack.
- Record the cloth position and any leak or release issue during the first supervised cycle.
Selection Confirmation Items
| Decision | Confirm before quotation |
|---|---|
| Direct replacement | Original cloth material, weave, dimensions, openings, mounting and quantity |
| Proposed improvement | Current problem, desired result, slurry conditions and approval method |
| Small trial | Trial quantity, plate positions, observation method and return feedback |
| Full set | Number of plates, spare requirement, packing and installation responsibility |
Plate & cloth measurement references
These illustrations are measurement guides only, not to scale and not manufacturing drawings. Record dimensions in millimetres from the actual part. Measure only after equipment has been safely isolated, depressurized and secured.
Frequently Asked Questions
What should I do if the replacement does not sit correctly?
Stop installation, do not cut the cloth or force the fixing, and do not bypass an interlock. Photograph the mismatch with the approved dimensions and contact Andy for review.
Can filter cloth replacement guarantee a particular cake moisture or cycle time?
No. Cake moisture and cycle time depend on slurry properties, feed conditions, plate and chamber geometry, pressure stages, washing and other operating factors. They require application-specific confirmation or testing.